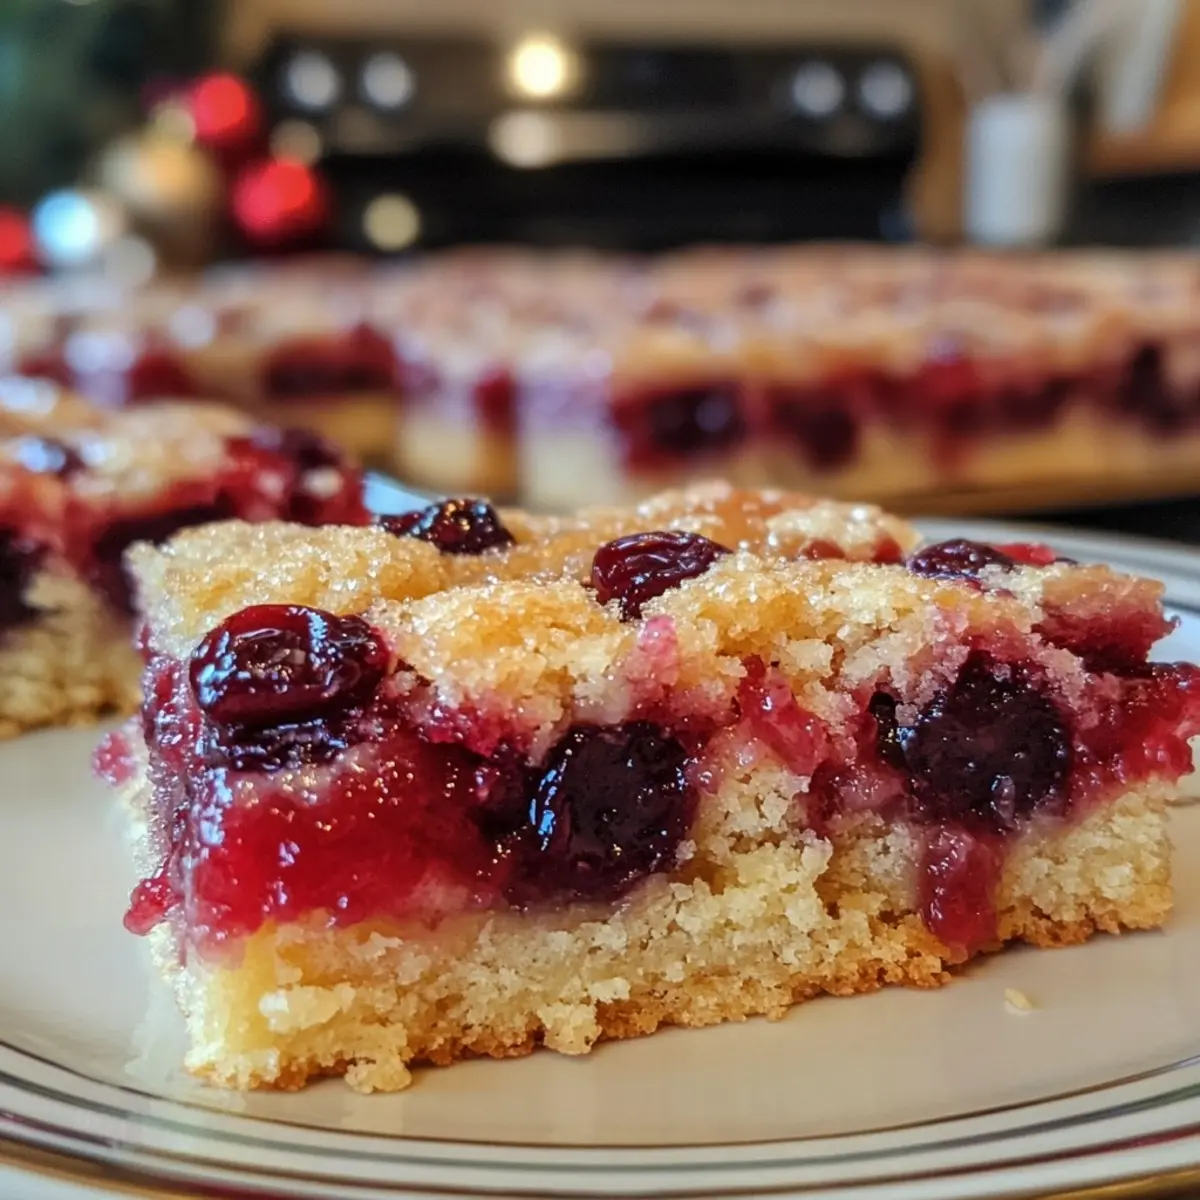
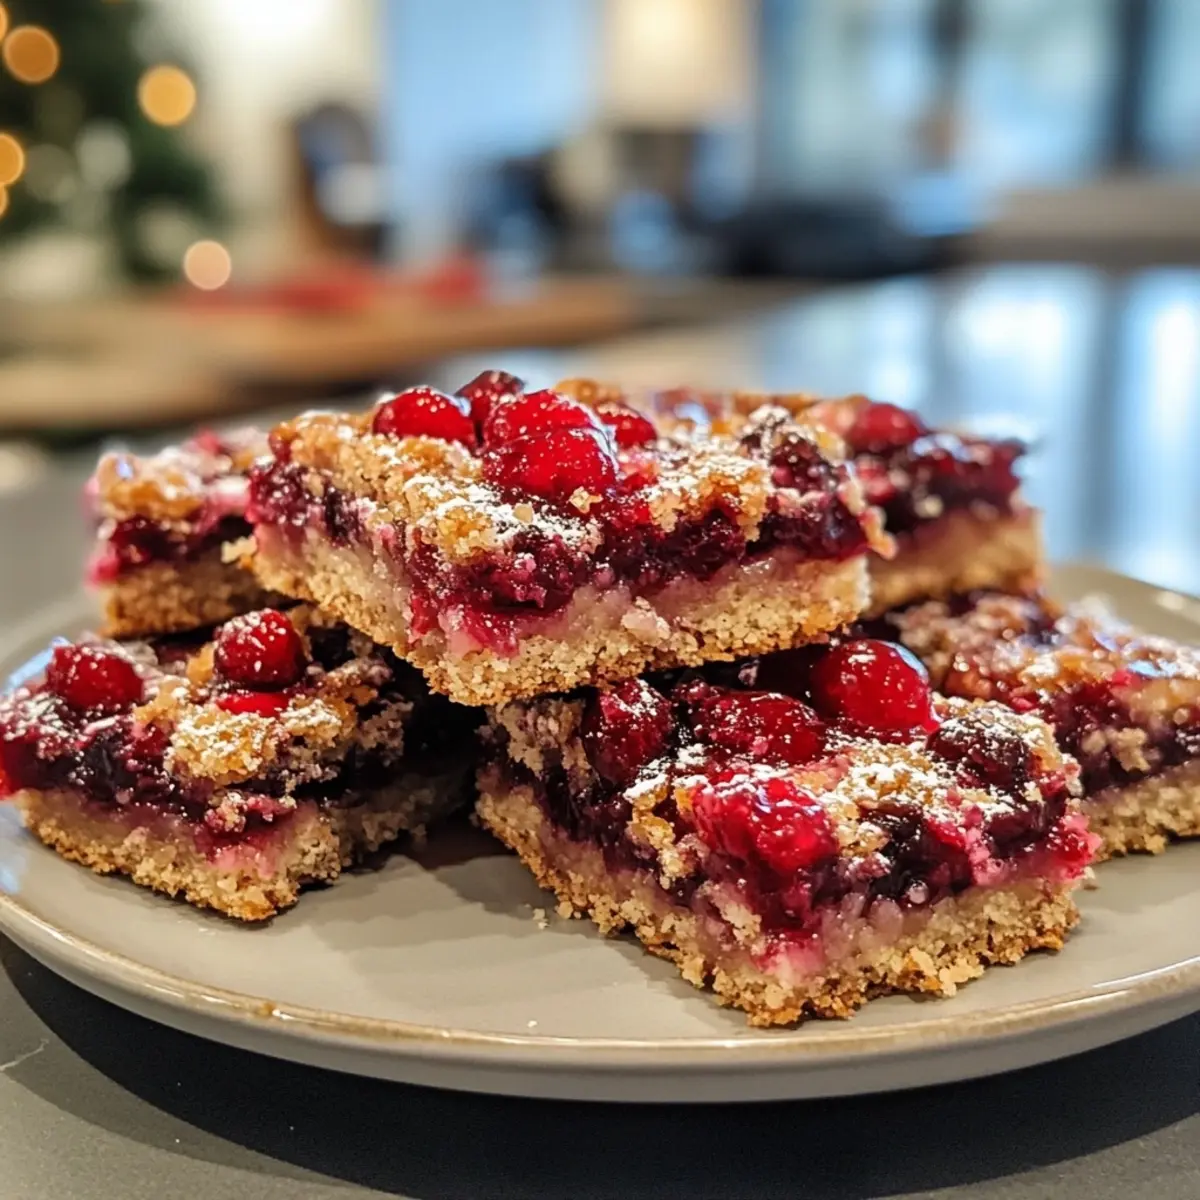
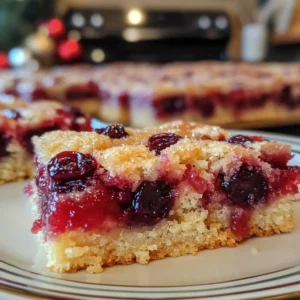
The holiday season is upon us, and that familiar aroma of warm cinnamon and sweet cherries is like an invitation to gather around the kitchen. Enter my Christmas Cherry Bars: a simple yet elegant dessert that boasts a buttery crust and a delightful burst of sweet-tart cherry filling. You won’t believe how easy they are to whip up, making them perfect for any festive occasion—whether you’re hosting a family gathering or looking to share homemade joy with friends.
Jump to:
- Why are <strong>Christmas Cherry Bars</strong> a must-try?
- <strong>Christmas Cherry Bars Ingredients</strong>
- How to Make Christmas Cherry Bars
- Make Ahead Options
- Expert Tips for Christmas Cherry Bars
- How to Store and Freeze Christmas Cherry Bars
- <strong>Christmas Cherry Bars</strong> Variations
- What to Serve with <strong>Christmas Cherry Bars</strong>?
- Christmas Cherry Bars Recipe FAQs
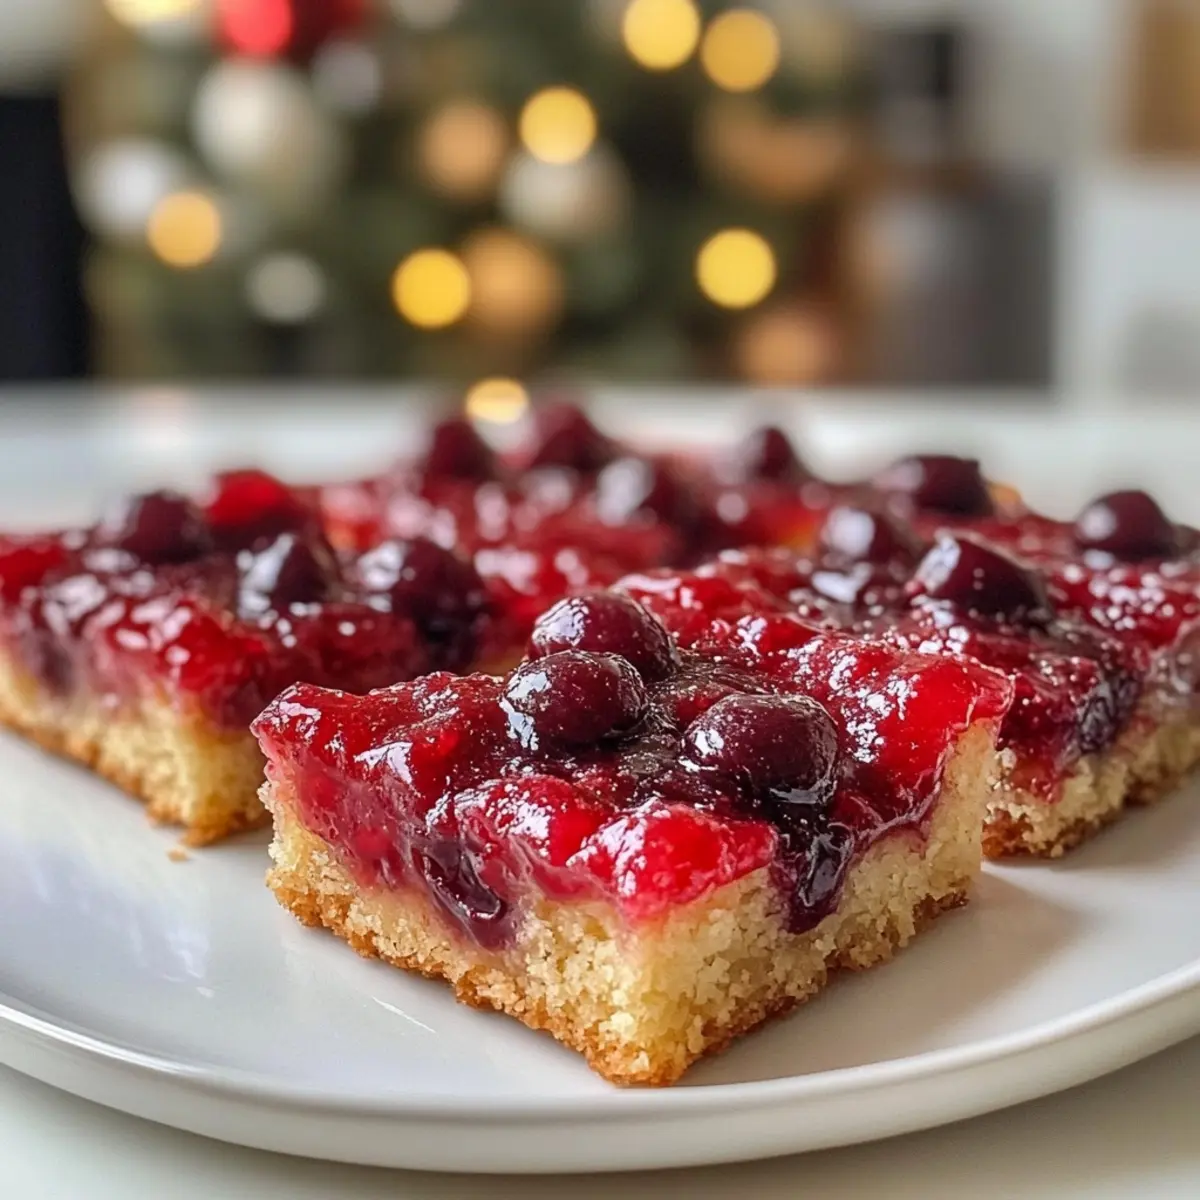
These bars come together quickly, meaning less time in the kitchen and more time enjoying the twinkling lights and laughter of the season. And let’s be honest, who can resist that glossy vanilla glaze drizzled over a slice of cherry goodness? For everyone craving a cozy, homemade treat that matches all the holiday cheer, these Christmas Cherry Bars are sure to shine on your dessert tray. Grab your baking pan, and let’s spread some holiday sweetness together!
Why are Christmas Cherry Bars a must-try?
Delightful flavors: The sweet-tart cherry filling paired with a buttery base creates a flavor explosion that will warm your heart.
Easily prepared: This recipe comes together effortlessly, perfect for busy holiday schedules.
Versatile serving options: Pair them with hot cocoa or spiced cider for a festive treat.
Stunning appearance: The glossy glaze and cherry drizzle make these bars a showstopper at any gathering.
Perfect for sharing: Ideal for parties and gatherings, these bars are sure to impress and spread cheer.
Don’t forget to check out my Snickerdoodle Cheesecake Bars for another delightful dessert option this holiday season!
Christmas Cherry Bars Ingredients
For the Base
• Unsalted Butter – Adds richness and moisture; use salted butter if needed, omitting any additional salt.
• Granulated Sugar – Provides sweetness and helps create the perfect texture; brown sugar can deepen the flavor.
• Eggs – Essential for binding; replace with flax eggs or applesauce for a vegan twist.
• Vanilla Extract – Enhances the overall flavor; almond extract can also be used for a classic essence.
• All-Purpose Flour – Forms the structure of the bars; consider gluten-free 1:1 flour if needed.
• Salt – Balances sweetness; a pinch of kosher salt is ideal.
For the Cherry Filling
• Cherry Pie Filling – Creates the signature sweet-tart flavor of these Christmas Cherry Bars; fresh or frozen cherries can serve as alternatives.
For the Glaze
• Powdered Sugar – The main sweetener for the icing, providing the right structure and flavor.
• Milk or Cream – Achieves the perfect glaze consistency; use plant-based milk for a dairy-free option.
• Additional Vanilla Extract for Glaze – Enhances glaze flavor; optional for a simpler version.
• Cherry Syrup (from pie filling) – Adds decorative flair and extra flavor; can be swapped for pure cherry juice.
How to Make Christmas Cherry Bars
- Preheat your oven to 350°F (175°C) and prepare a 9×13-inch baking pan by greasing it or lining with parchment paper to ensure easy removal.
- Cream together the unsalted butter and granulated sugar in a large bowl until the mixture is light and fluffy, which should take about 3-5 minutes—this helps create that rich, buttery texture.
- Add eggs one at a time, mixing well after each addition, then stir in the vanilla and almond extracts for an extra layer of flavor that elevates the bars.
- Whisk together the all-purpose flour and salt in a separate bowl; gradually incorporate this dry mixture into the butter mixture until smooth, forming a thick batter.
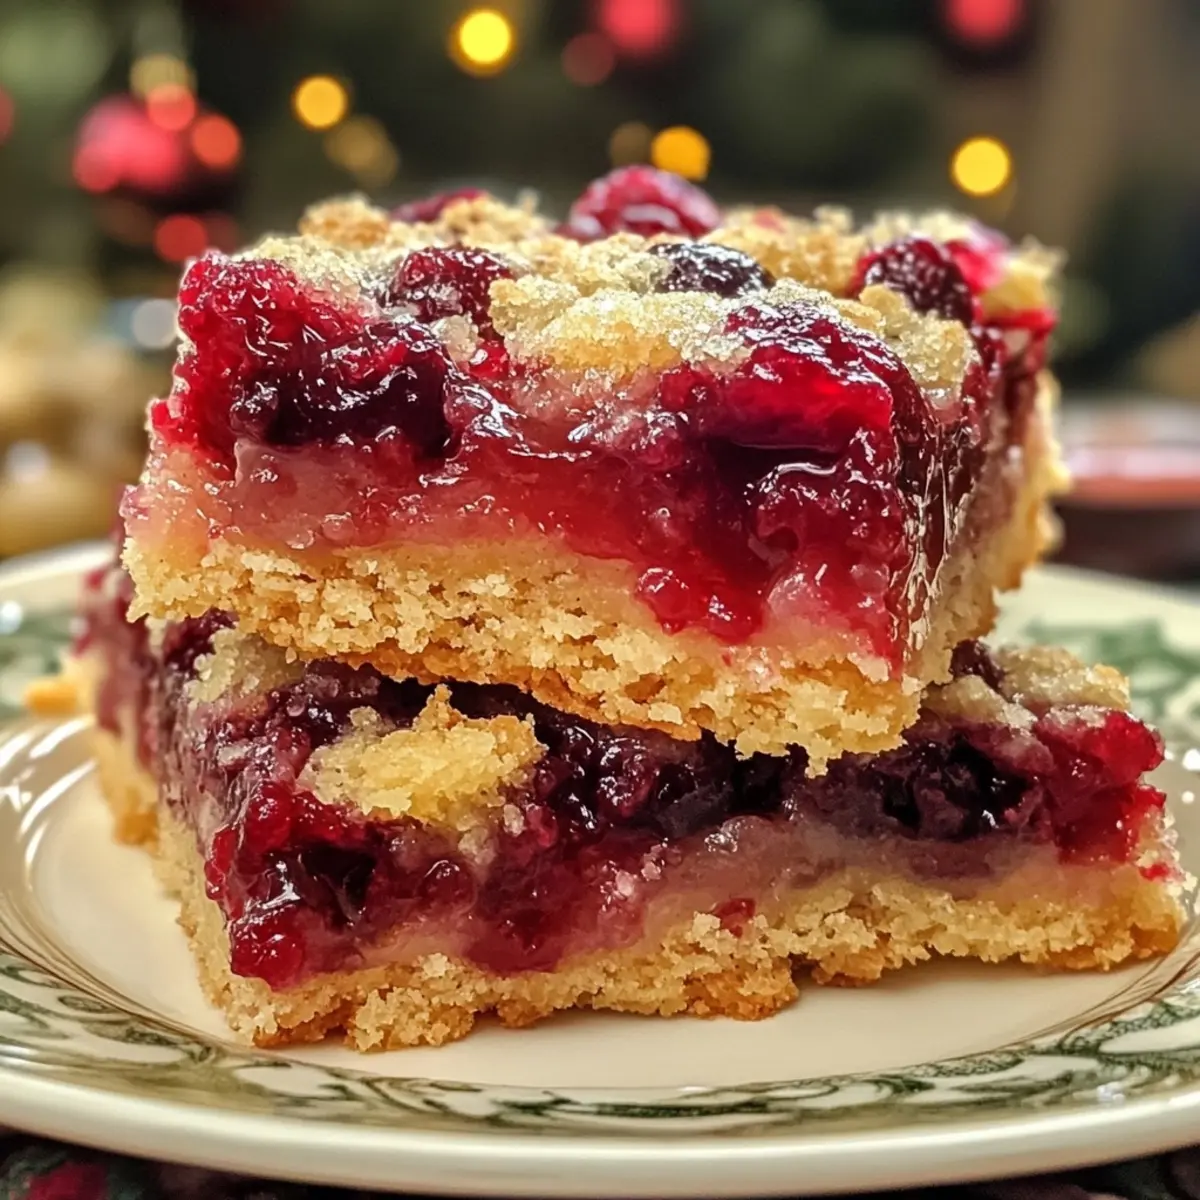
- Spread two-thirds of the batter evenly into the prepared pan, creating a nice base for your sweet-tart cherry filling.
- Layer the cherry pie filling evenly over the batter, then drop dollops of the remaining batter on top, allowing some cherries to peek through for a beautiful rustic look.
- Bake for 35-40 minutes until the top is golden brown and a toothpick inserted into the center comes out clean, filling your kitchen with the irresistible scent of cherry.
- Cool the bars completely in the pan before glazing; this ensures those slices come out neatly and beautifully for serving.
- Mix the powdered sugar, milk (or cream), and additional vanilla in a bowl to create a smooth glaze, then drizzle it over the cooled bars. Finish with a drizzle of cherry syrup for that festive touch.
Optional: Serve these bars warm or at room temperature for a delightful treat.
Exact quantities are listed in the recipe card below.
Make Ahead Options
These Christmas Cherry Bars are perfect for meal prep enthusiasts! You can prepare the buttery base up to 24 hours in advance by mixing the batter and storing it, tightly covered, in the refrigerator. The cherry pie filling can also be added up to 3 days ahead; just keep it in an airtight container. When you’re ready to bake, simply spread the prepared batter in the pan, layer the filling, and bake as instructed. To maintain the bars’ freshness, make sure they are completely cooled before glazing and store them in an airtight container at room temperature for up to 4 days. With these make-ahead options, you’ll enjoy delicious, stress-free holiday treats!
Expert Tips for Christmas Cherry Bars
- Cool Completely: Allow the bars to cool completely before glazing to ensure clean cuts and prevent the glaze from melting into the bars.
- Parchment Paper: Line your baking pan with parchment paper for easy removal, making it a breeze to serve your Christmas Cherry Bars.
- Almond Extract Adjustment: Experiment with the almond extract according to your taste; a little goes a long way in enhancing the cherry flavor!
- Quality Ingredients: Use high-quality cherry pie filling or fresh cherries to elevate the flavor of your Christmas Cherry Bars.
- Storage Matters: Store bars in an airtight container for up to 4 days at room temperature or refrigerate for a week to keep them fresh.
How to Store and Freeze Christmas Cherry Bars
Room Temperature: Store your Christmas Cherry Bars in an airtight container at room temperature for up to 4 days. This keeps them fresh and maintains their delightful texture.
Fridge: If you want your bars to last longer, refrigerate them in an airtight container for up to 1 week. This will help preserve the sweet-tart flavor of the cherries.
Freezer: For longer storage, freeze the bars wrapped tightly in plastic wrap and then placed in a freezer-safe container. They can be stored this way for up to 3 months.
Reheating: To enjoy your Christmas Cherry Bars warm, simply thaw in the fridge overnight and reheat in a preheated oven at 350°F (175°C) for 10-15 minutes, until warmed through.
Christmas Cherry Bars Variations
Feel free to add your personal touch to these delightful bars with these creative adaptations!
- Berry Bliss: Swap the cherry pie filling for blueberry or raspberry for a fruity twist that’s equally delicious.
- Nutty Crunch: Fold in some chopped pecans or walnuts into the batter for a delightful crunch and added flavor.
- Coconut Cream: Use coconut cream instead of milk for a creamy, dairy-free glaze that brings a tropical vibe.
- Spiced Up: Add a pinch of cinnamon or nutmeg to the batter for a warm, festive spice that dances with the cherries.
- Lemon Zest: Stir in a teaspoon of fresh lemon zest for a zesty brightness that complements the sweet cherries perfectly.
- Chocolate Drizzle: Drizzle melted chocolate over the glaze for a decadent layer of richness that chocolate lovers will adore.
- Chili Kick: Sprinkle a hint of cayenne pepper into the batter for a surprising and delightful heat that pairs well with cherries.
- Caramel Swirl: Create a luscious caramel swirl between the layers for a sweet, gooey addition that elevates every bite.
What to Serve with Christmas Cherry Bars?
These festive treats are the perfect addition to your holiday dessert table, inviting everyone to indulge in their sweet-tart goodness.
- Hot Cocoa: A warm, chocolatey beverage that complements the cherry bars’ buttery richness, creating a cozy pairing for chilly evenings.
- Spiced Cider: The warm spices in this drink beautifully enhance the flavors of the cherry filling, making each bite feel like a warm hug.
- Whipped Cream: A dollop of lightly sweetened whipped cream adds a creamy contrast to the sweet-tart cherries, turning each bar into a more decadent experience.
- Vanilla Ice Cream: The creaminess of vanilla ice cream creates a delightful blend with the cherry bars, making for an indulgent dessert that’s hard to resist.
- Coffee: A rich, aromatic cup of coffee balances the sweetness of the bars perfectly, providing that essential pick-me-up after a festive meal.
- Christmas Cookies: Serve alongside a selection of holiday cookies for a delightful dessert spread; variety invites everyone to indulge their sweet tooth.
- Fresh Fruit Salad: A refreshing mix of bright fruits adds a pop of color and balances the rich flavors of the bars with a light, juicy touch.
These pairing options will elevate your festive gatherings, ensuring that your Christmas Cherry Bars shine brightly on any dessert tray!
Christmas Cherry Bars Recipe FAQs
What kind of cherries should I use for Christmas Cherry Bars?
Absolutely! For the best flavor, use high-quality cherry pie filling, which provides that irresistible sweet-tart flavor. If you prefer a fresher approach, you can also use fresh or frozen cherries—just make sure they’re sweetened to taste if using fresh.
How should I store my Christmas Cherry Bars?
These delightful bars can be stored in an airtight container at room temperature for up to 4 days. If you want them to last longer, refrigerate them, and they’ll stay fresh for up to a week. Just make sure the lid is on tight to maintain their lovely texture!
Can I freeze these bars for later?
Very! To freeze your Christmas Cherry Bars, first let them cool completely. Then, wrap them tightly in plastic wrap and place them in a freezer-safe container. They can be frozen for up to 3 months. To enjoy, simply thaw them in the refrigerator overnight and reheat in the oven for a warm treat again.
What should I do if my bars are too crumbly?
If your Christmas Cherry Bars turn out crumbly, it could be due to over-mixing the batter or not enough moisture. Ensure to mix just until combined, and consider adding a touch more butter or an extra egg next time to create a richer texture.
Are there any dietary considerations I should keep in mind?
Absolutely! If you or your guests have nut allergies, feel free to omit the almond extract from the recipe. Additionally, for a vegan option, substitute the eggs with flax eggs or applesauce, and use plant-based milk for the glaze. Everyone deserves to enjoy these Christmas Cherry Bars!
How do I know when the bars are done baking?
You’ll want to bake your Christmas Cherry Bars for about 35-40 minutes or until the top is a lovely golden brown. The best way to check for doneness is to insert a toothpick into the center: if it comes out clean, your bars are ready to come out of the oven!
Irresistibly Buttery Christmas Cherry Bars That Everyone Loves
Equipment
- 9x13-inch baking pan
- Mixing Bowls
- Whisk
- Spatula
Ingredients
For the Base
- 1 cup Unsalted Butter or salted butter without additional salt
- 1 cup Granulated Sugar brown sugar can be used
- 2 Eggs or flax eggs/applesauce for vegan option
- 2 teaspoons Vanilla Extract or almond extract for extra flavor
- 2 cups All-Purpose Flour gluten-free 1:1 flour can be substituted
- 1 teaspoon Salt a pinch of kosher salt is ideal
For the Cherry Filling
- 1 can Cherry Pie Filling fresh or frozen cherries can be alternatives
For the Glaze
- 1 cup Powdered Sugar
- 2 tablespoons Milk or Cream plant-based milk for a dairy-free option
- 1 teaspoon Additional Vanilla Extract for Glaze optional
- 2 tablespoons Cherry Syrup (from pie filling) or pure cherry juice as a substitute
Instructions
Preparation
- Preheat your oven to 350°F (175°C) and prepare a 9x13-inch baking pan by greasing it or lining with parchment paper.
- Cream together the unsalted butter and granulated sugar until light and fluffy, about 3-5 minutes.
- Add eggs one at a time, mixing well after each addition, then stir in vanilla and almond extracts.
- Whisk together the all-purpose flour and salt in a separate bowl; gradually incorporate into the butter mixture until smooth.
- Spread two-thirds of the batter into the prepared pan, creating a base for the cherry filling.
- Layer the cherry pie filling over the batter, then drop dollops of remaining batter on top.
- Bake for 35-40 minutes until the top is golden brown; a toothpick should come out clean.
- Cool the bars completely in the pan before glazing.
- Mix powdered sugar, milk (or cream), and additional vanilla in a bowl for a smooth glaze, then drizzle it over cooled bars.
- Finish with a drizzle of cherry syrup for decoration.
Notes